
How To: Fall Décor on a Budget
How To: Fall Décor on a Budget
 Ah, fall. The absolute best time of the year. A time to refresh your mind, body, and home. Lucky for you I have some budget-friendly, easy to create fall décor to help get you in the spirit of the season. These DIY’s are pretty much foolproof. Seriously, there are no rules. So, read on and take a few notes. We’re going to have some fun!
1. Toilet Paper Pumpkin
Public Service Announcement: toilet paper is not just for your bum! You read that right. I can remember saving my toilet paper rolls to make “candy rolls” in high school. Our cheer coach would make us stuff the toilet paper rolls with candy and wrap them in festive tissue paper. We’d tie each end off with a ribbon and they would be ready to be tossed into the crowd at football and basketball games. Wouldn’t be a bad idea for other celebrations as well. This particular craft calls for a full roll of toilet paper. You’ll start by unrolling the toilet paper a few times and then you’ll wrap it back around the roll in a somewhat messy fashion. This is going to make your pumpkin look plump. From there you will need a 18 x 18 square piece of fabric. Place the toilet paper in the center and gather the fabric around the roll and stuff the loose ends into the center of the roll. Pro tip: use a pencil to help stuff the excess fabric into the middle. To top it off you can place anything you want in the center. To keep it cheap, I like to grab a stick from my yard. You can also add a bit of green felt or ribbon to the stem if you want to add a leaf.
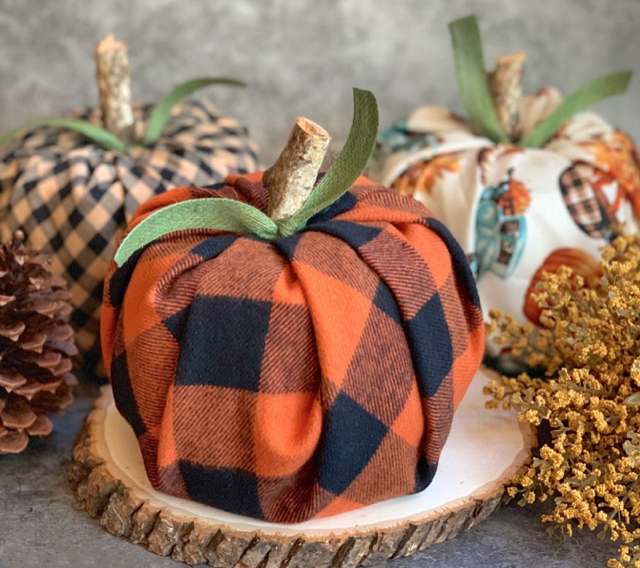
Photo by instrupix.com
2. Painted Pumpkin Sign
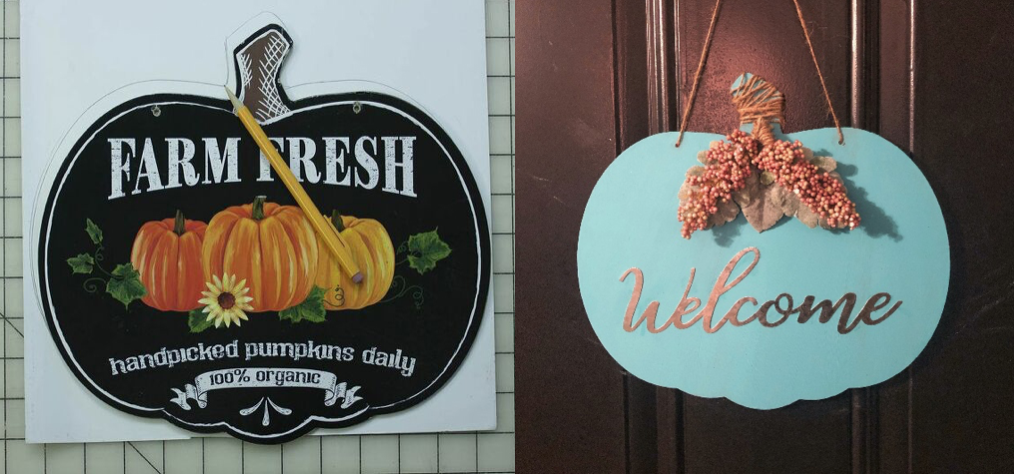
I love this DIY project. This craft, in particular, gives you the opportunity to get really creative. I found this wooden pumpkin sign at Dollar Tree. I flipped the sign over and painted the back with a sponge brush. I decided to go with blue because I wanted the sign to pop but you can go with any color you like. I also bought the welcome sign from Dollar Tree as well. It came in a pack of three with the words thankful and harvest (can’t wait to use those on another craft! ) I chose the welcome sign so I could display it in my living room and see it right when you walk in my front door. After my paint dried, I used just a basic craft glue to place my welcome word onto the pumpkin. You may be able to use hot glue but the sign is metal and I didn’t want to burn myself. If you can’t find the metal signs at Dollar Tree or aren’t a fan you can always hand paint your word onto the pumpkin as well. After I placed my sign I decided to just wrap the stem of the pumpkin in twine to serve as a backdrop for my artificial flowers. I had the lambs ear leaves left over from my wedding and found the pink flowers on sale for less than a dollar a stem at Joann’s. I just used a hot glue gun to keep the flowers and leave in place. That’s all there is to this easy fall pumpkin sign!
Before After
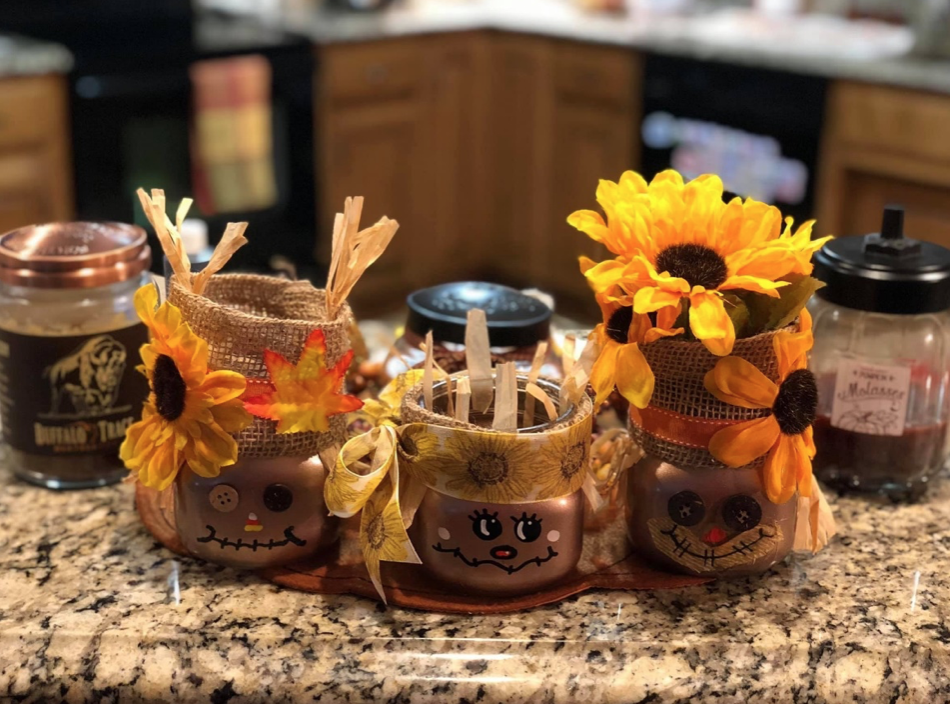
This one is super cute! I can’t take credit for this because this was all my sister in law’s idea. We started with three mini mason jars. We removed the lid and spray painted them a metallic bronze for the base. After the jars were completely dry, we hot glued artificial hay straws onto the sides and the inside. We then grabbed our ribbon of choice to go around the top. My mom and sister in law chose burlap while I went with a sunflower ribbon. While my mom and sister in law hot glued their burlap around the rim of the mason jar, I tied my ribbon in a bow around the rim. I glued some burlap under my ribbon as well but I folded it in half to make it less noticeable. The last step is the scarecrow faces. While the girls opted for button eyes and candy corn noses, I went for a more whimsical face. With paint markers, I drew eyes, a nose, and a mouth onto the front as you can see below. All you need now is a tiny tealight and you have an adorable centerpiece and night light.
Got a super easy craft idea? Drop a line in the comments and join in on the fun! We can’t wait to test out your ideas.
Until next time,
Savanna